Bonjour, my crafty friends.
Holy moly, I wrote that first blog post what feels like a zillions years ago. I unfortunately (and foolishly) began that extra little venture right before Valentine's Day, and was immediately inundated with card-requests that kept me from my new blog-baby. THEN, just as I began to sit back and think 'aha! NOW I have time to write a new blog post!' I realised that Mother's Day was right around the corner. This left me not only unable to write a new post, but also to stock up the website. Luckily, after Mother's Day, I devoted some long-overdue TLC to both my crafting and the website, and there are lots of new products up for grabs, as well as a shiny new "£3 and under" section (excluding postage)! Go to
www.fingerprintgreetings.co.uk to view and purchase the labours of my love :)
Just after Valentine's Day, I got some great new supplies in, including ribbons, buttons, inks, mulberry paper flowers and some beautiful new paper and card packs. I have also recently invested in an envelope-making board, so almost all of my new products will include custom envelopes, for an added personal touch.
Righty-ho, on with the blog! This post is outlining some of the tools and products that I consider to be my essentials. If YOU want to try your hand at card making, this could be helpful. If you don't, then you at least get to see the kind of effort that I am putting into the cards you may be purchasing!
Cardstock and Paper:
Seems both obvious and silly, but this is a crucial choice. It's not just about choosing the colour of the card. There are different weights of cardstock, different finishes. The wrong finish will result in bleeding ink; too lightweight a cardstock will result in a bending card that can't hold itself up; too heavy, and a horizontal card will also fail to stand up (not to mention increased postage costs. It's very delicate stuff. I've had some very funny looks, standing in shops touching all of the card on display, but I assure you that it's all because I want to very best results :)
Cutting & Trimming:
Scissors are pretty much a given here, so I won't go on about them, although obviously you want a decent pair, and residue (adhesive, ink) needs to be regularly cleaned from the blades.
The range of paper-trimmers and guillotines available to crafters is absolutely enormous. I have plumped for a Fingerguard paper trimmer, which has interchangeable blade cartridges, for creating different cut edges e.g. straight, wavy line, zig-zag, perforated etc.
On top of this, I have recently purchased a circle scissor (picture below), obviously for cutting out circles.
 |
| EK Success Circle Scissor Pro |
As I have a die-cutting machine, I COULD have bought a set of circle dies, but the beauty of this little contraption is that you can cut a circle/aperture of ANY size between 1 and 6 inches in diameter. The blade is inserted into any of the little holes on the board, which go up in 1/8th of an inch increments. Using the blade as a handle, you rotate the scissor 360 degrees, and you have yourself a circle or aperture of whatever size you need.
"Why would you need to cut a circle so badly that you buy a special gizmo for it?" I hear you ask. I'm glad you did. The answer is this: A little circle is perfect for stamping/adhering your sentiments (e.g. 'Happy Birthday', 'Congratulations', 'Merry Christmas') onto, as a focal image for the card. Although die-cutting can create some beautiful little shapes and designs, as you are limited to how many you can cut (in one pass, through the machine), it can be time-consuming. If I want to cut ten circles, and I only have ONE die that's the size I need, I need to either put that through the machine ten times. I COULD put it through fewer times with multiple sheets of card/paper at once, but I'd have to hope that the card/paper is thin enough that the die makes a clean cut through all layers. With magical circle scissor, you can simply pop the paper underneath, cut, move the scissor or the paper, cut again and so on. Before you know it, you've got your ten circles cut out in which time you could only have created one, two, or possibly three die-cuts. Then you pop your sentiment onto that, and you've got a lovely, clean focal point on your card, like this:
 |
| If you like this card, you can find it (and its brothers and sisters) on the website now! |
Embellishments:
I've mentioned a few different embellishments so far. Buttons, gems, ribbons and twine are the usual suspects; they come in a preposterous variety of sizes, shapes, colours and style, and you can create some lovely effects by using them. Twine's especially handy for jazzing up a masculine card. It's aesthetically lovely, but not frilly or lacy, (and therefore, girly).
Pictured (left) are a couple of examples of the buttons and twine that I use. I know, it's exciting- hold onto your seats.
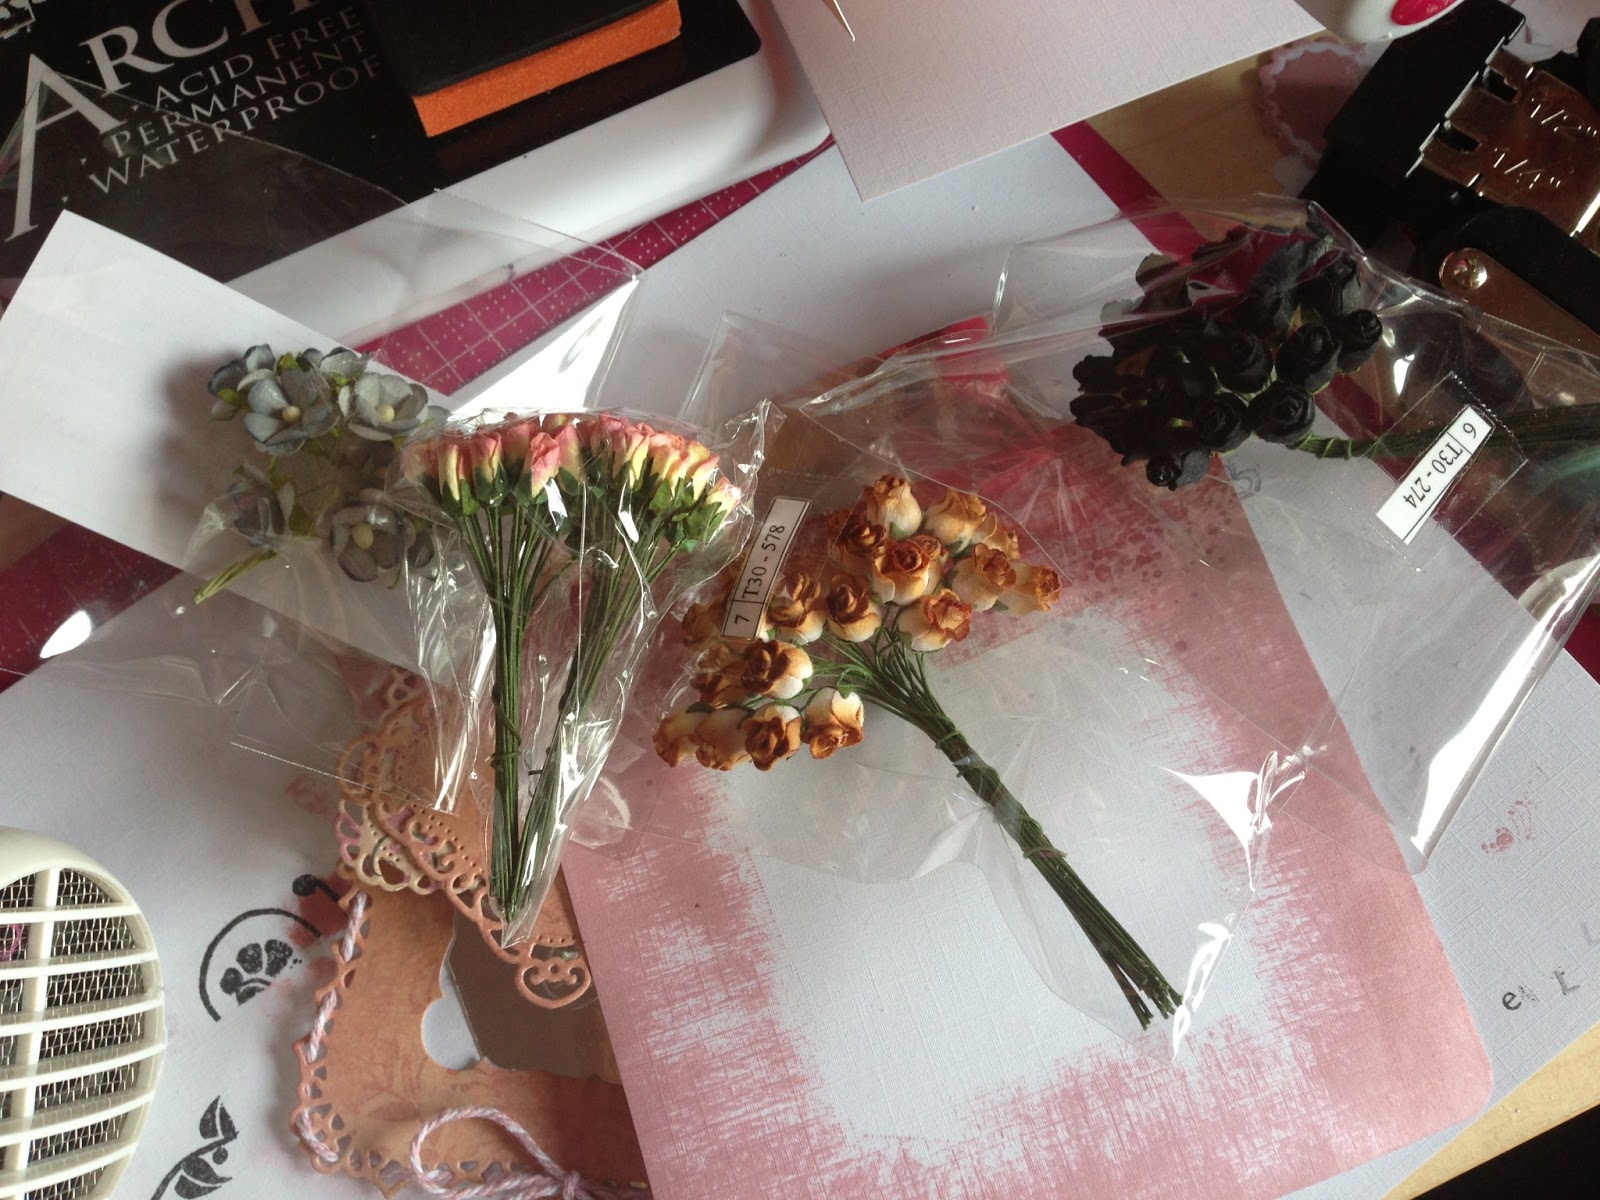
I've also mentioned mulberry paper flowers a couple of times now. A few of you may be wondering what these are. Luckily, I am about to show you- tada!
The tiny roses and rose buds in the top picture are the same as the ones that I used on the card I showed above (to demonstrate the circle scissor). The bottom photo was taken whilst I was mid-task, inking up plain white flowers for use on Christmas cards. If you're thinking that they look familiar, it's because the finished card that I made with these is shown in the first blog post!
I buy all of these flowers from
I Am Roses, who stock an incredible number of paper flowers in HUGE variety of colours and sizes! I've always been impressed too, that I've never waited longer than about 4 days for delivery, although they're based in Thailand! On top of THAT, they always send me a couple of samples of new products with my orders, which is great as it gives me new ideas and inspiration!
Well, those are just a few examples of my most prized supplies. The next blog is more than likely to outline the joys and wonders of die-cutting. Despite the time-efficiency issue I mentioned in the circle-scissor section, my die-cutting machine is very possibly my most beloved item, which I coveted for about six months before eventually buying. For those of you who are interested (pretty much only the papercrafters among you), I have a Spellbinders Grand Calibur.
Anyway, that's all for this post! Remember to drop by
www.fingerprintgreetings.co.uk to see all of the new cards!
Talk soon, craft-fans!
Charley
xxx